
A quality treadmill can run for a decade. Then reality hits. Even the best-built machines slow down, stall, or throw error codes once wear catches up with daily use. That is where Life Fitness treadmill repair becomes a practical skill worth knowing, whether you own one at home or manage a floor full of them at a busy gym.
Life Fitness builds some of the most durable equipment in the industry. Still, no motor, belt, or console lasts forever without care. Below, you will find the common failures, safe troubleshooting steps, and a maintenance routine that keeps these machines running longer and costing you less.
Why Life Fitness Treadmills Need Repairs
Every treadmill wears out in predictable ways. Understanding those patterns helps you fix small issues before they turn into expensive ones.
Life Fitness treadmills need repairs because of heavy usage, dried-out belts, dust buildup, electrical wear, and aging internal parts. Commercial units in gyms run 12 or more hours a day, so they wear faster than home models. Regular maintenance slows this process, but friction, heat, and mechanical stress eventually demand attention.
Here are the main causes of breakdowns:
- Heavy usage. Constant running strains the motor, belt, and rollers, especially on commercial floors.
- Lack of lubrication. A dry deck creates friction, which overheats the motor and shortens belt life.
- Dust buildup. Debris collects inside the motor compartment and traps heat.
- Worn belts. Belts stretch and fray over time, causing slipping and uneven traction.
- Electrical wear. Power surges and loose wiring degrade the control board and console.
- Aging components. Bearings, brushes, and rollers simply reach the end of their service life.
Residential models handle lighter loads, so they age slower. Commercial treadmills, by contrast, need tighter maintenance schedules and often more frequent commercial treadmill repair.
Common Life Fitness Treadmill Problems
Most issues show up as one of a handful of symptoms. Knowing what each one signals saves you diagnostic time.
The most common Life Fitness treadmill problems include the machine not starting, belt slipping, sudden stops, burning smells, console failures, error codes, incline malfunctions, loud motor noise, speed inconsistency, and overheating. Many trace back to poor maintenance, worn belts, or electrical faults rather than serious mechanical failure.
- Treadmill won’t start. Usually a loose power cord, tripped breaker, or improperly seated safety key.
- Running belt slipping. Often caused by a loose or overstretched belt that needs tensioning.
- Belt stopping suddenly. Points to a friction problem, a failing motor, or a controller fault.
- Burning smell. A warning sign. Stop immediately, since it signals friction, worn brushes, or electrical shorts.
- Console not working. Frequently a loose data cable, dead batteries, or a failing control board.
- Error codes. Coded alerts that flag speed sensors, incline motors, or communication faults.
- Incline not functioning. Typically a stuck incline motor or a broken lift cable.
- Loud motor noises. Grinding or squealing usually means worn bearings or dry rollers.
- Speed inconsistencies. Often a stretched belt, a dirty deck, or a speed sensor issue.
- Overheating. Caused by dust, dry lubrication, or blocked airflow around the motor.
Step-by-Step Troubleshooting Guide
Guessing wastes time and can damage parts. A structured check finds the fault faster and keeps you safe.
To troubleshoot a Life Fitness treadmill, unplug it first, then check the power supply, breaker, safety key, belt tension, lubrication, roller alignment, motor condition, and console connections before recalibrating. Always disconnect power before opening any panel. Working on a live machine risks electric shock and serious injury.
Follow these steps in order:
- Check the power supply. Confirm the cord is fully seated and the outlet delivers power. Test with another device.
- Inspect the circuit breaker. Reset the treadmill’s onboard breaker and the wall breaker if either has tripped.
- Reseat the safety key. A misaligned magnetic key stops the treadmill from starting. Remove and replace it firmly.
- Inspect the belt. Look for fraying, cracks, or slipping. Slide your hand under the edge to check tension.
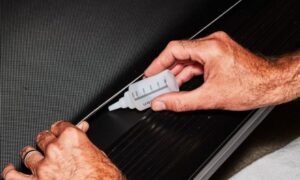
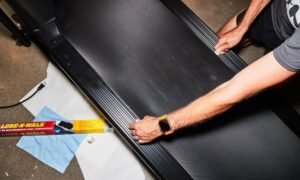
- Check lubrication. Lift the belt and feel the deck. A dry surface needs silicone treadmill lubrication.
- Adjust the rollers. Use the rear roller bolts to correct tracking if the belt drifts to one side.
- Inspect the motor. Unplug, open the motor cover, and look for dust, burnt smells, or worn brushes.
- Reset the console. Power-cycle the unit for 60 seconds to clear temporary faults.
- Recalibrate. Run the calibration sequence from the manual to sync speed and incline readings.
If the fault stays after these steps, the problem likely sits deeper in the electronics. That is when Life Fitness treadmill troubleshooting shifts from DIY to professional service.
Preventive Maintenance Checklist
Most repairs come from skipped maintenance, not bad luck. A consistent routine prevents the majority of failures and stretches the life of your equipment.
Preventive maintenance for a Life Fitness treadmill includes weekly cleaning, monthly inspections, scheduled belt lubrication, vacuuming the motor compartment, tightening bolts, aligning rollers, and checking electrical connections. These habits reduce friction, prevent overheating, and cut long-term repair costs on both home and commercial machines.
Use this schedule:
- Weekly cleaning. Wipe the belt, deck, and console. Clear dust from the base and vents.
- Monthly inspection. Check belt tension, tracking, and bolt tightness across the frame.
- Belt lubrication. Apply silicone lubricant every 150 miles or every three months, whichever comes first.
- Vacuum the motor compartment. Unplug, remove the cover, and clear dust every three to six months.
- Check bolts. Tighten deck, roller, and frame bolts that loosen from vibration.
- Roller alignment. Confirm the belt runs centered and adjust as needed.
- Electrical inspection. Look for frayed cords and loose connectors during each service.
For commercial treadmill repair, schedule these checks more often. Gyms should also book an annual professional inspection to catch wear the eye cannot see.
When to Replace Parts
Repair works until it doesn’t. Some parts reach a point where replacement is cheaper and safer than another patch.
Replace a treadmill part when repair no longer restores safe function. A frayed running belt, a scored deck, worn motor brushes, or a failing control board all signal replacement time. Ignoring these signs raises the risk of motor burnout and further damage.
Watch for these signs:
- Running belt. Fraying edges, cracks, or persistent slipping call for treadmill belt replacement.
- Deck. A rough, worn, or scored surface increases friction and needs replacing.
- Drive belt. Squealing or slipping under load means the drive belt is stretched.
- Rollers. Grinding noise or uneven belt movement points to worn roller bearings.
- Motor brushes. Sparking or weak power delivery indicates brushes are near the end.
- Incline motor. No response or grinding during incline changes signals motor failure.
- Control board. Repeated error codes and console faults often trace back to the board.
Always fit genuine Life Fitness parts. Aftermarket components may not match the tolerances, and a mismatched belt or board can void your warranty or damage the motor. Genuine parts protect both performance and safety.
DIY Repair vs Professional Repair
Not every fix belongs in your hands. Knowing the line between the two protects your safety and your warranty.
You can safely handle basic treadmill maintenance yourself, but electrical and motor repairs need a professional. DIY tasks include lubrication, belt tensioning, cleaning, and safety key replacement. Motor swaps, control board work, incline motor repair, and internal wiring require trained technicians and proper tools.
Handle these yourself:
- Belt lubrication and cleaning
- Belt tension and tracking adjustments
- Safety key replacement
- Dust removal from the motor compartment
Call a professional for these:
- Treadmill motor repair or full motor replacement
- Control board diagnosis and treadmill console repair
- Electrical faults and internal wiring
- Incline motor repair
The reason is simple. Motor and electrical work carries shock risk and demands calibration equipment most owners do not have. A wrong repair can cost more than the original fault. For gyms, a service contract usually pays for itself in reduced downtime.
Frequently Asked Questions
Why is my Life Fitness treadmill stopping during workouts?
Sudden stops usually come from a loose safety key, an overstretched belt, or an overheating motor. Dust buildup and dry lubrication raise friction, which triggers safety shutdowns. Clean the compartment, lubricate the deck, and check belt tension first before assuming a motor fault.
How often should I lubricate it?
Lubricate a Life Fitness treadmill every three months or every 150 miles of use. Commercial units in gyms need it more often because of heavy daily traffic. Use only silicone-based treadmill lubrication, since other oils damage the belt and deck.
Can I replace the running belt myself?
Yes, treadmill belt replacement is a manageable DIY job if you follow the manual. You will loosen the rollers, remove the old belt, fit the genuine replacement, and reset the tension and tracking. Take your time with alignment, since a poorly seated belt slips and wears fast.
Why is the treadmill making grinding noises?
Grinding usually means worn roller bearings, a dry deck, or debris caught under the belt. First, clean the belt and deck, then check lubrication. If the noise continues after that, the rollers or motor bearings likely need inspection by a technician.
How long do Life Fitness treadmills last?
Home models typically last 10 to 12 years with proper care. Commercial units, built for constant use, often run 7 to 10 years under heavy gym loads. Consistent fitness equipment maintenance is the single biggest factor in reaching those numbers.
What causes treadmill error codes?
Treadmill error codes flag specific faults, such as speed sensor errors, incline motor failures, or console communication breaks. Check your manual to decode the exact message. Many clear with a console reset, but repeated codes usually point to a failing sensor or control board.
Conclusion
Reliable equipment still needs upkeep. Life Fitness treadmill repair is far easier and cheaper when you catch problems early and follow a steady maintenance routine. Regular cleaning, timely lubrication, and quick belt adjustments prevent most breakdowns before they start.
Handle the simple fixes yourself, but call a professional for motor, electrical, and control board work. Always use genuine parts, and book annual inspections for commercial machines. Do that, and you will keep your treadmill running safely, quietly, and for years longer than a neglected one ever could.