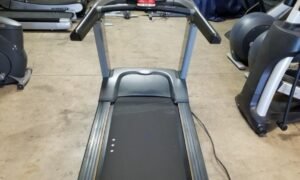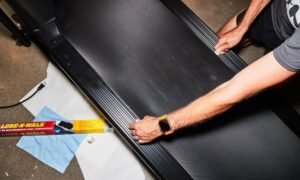

To adjust a treadmill belt, unplug the machine, then use a hex wrench to turn the rear roller adjustment bolts clockwise in small increments to increase tension or correct alignment. Make quarter-turn adjustments at a time, test the belt after each turn, and consult your owner’s manual for model-specific torque specifications before beginning.
A slipping treadmill belt is more than an annoyance. It disrupts your stride, puts extra strain on the motor, and—if left unaddressed—can become a safety hazard. The good news is that most treadmill belt adjustments are manageable with basic tools and some patience. The risk is in doing too much, too fast.
This guide walks you through how to adjust a treadmill belt correctly: how to tighten it when it’s slipping, how to center it when it drifts, and how to recognize when the problem goes beyond a simple fix. Whether you’re maintaining a home machine or managing commercial equipment, the principles apply across most treadmill models.
Why Does a Treadmill Belt Need Adjustment?
Treadmill belts stretch over time. This is normal. Every stride transfers force through the belt and across the rollers, and that repeated mechanical stress gradually causes the belt to loosen. Heat from the motor and friction from the deck compound the effect.
Alignment drift is a separate but related issue. When the tension on one side of the rear roller differs from the other—even slightly—the belt migrates toward the side with less tension. This can happen gradually through regular use, or more suddenly if the machine is moved or if one side of the roller loosens on its own.
Understanding what causes the problem helps you fix it correctly. A belt that keeps slipping after tensioning may have a worn deck, a failing drive motor, or insufficient lubrication. A belt that keeps drifting after centering may indicate a bent roller or frame misalignment. Adjustment addresses the symptom; identifying the root cause prevents the problem from recurring.
Signs Your Treadmill Belt Needs Adjustment
Your treadmill will usually give you clear signals before the problem becomes serious. Watch for:
- Slipping or hesitation under your foot, especially during faster speeds or incline changes
- The belt drifting to one side, rubbing against the frame or edge of the deck
- A burning smell, which may indicate the belt is dragging against the deck due to excessive friction
- Uneven wear patterns on the underside of the belt
- Increased motor noise as the motor works harder to compensate for belt resistance
If you notice any of these signs, address them before your next workout. Running on a misaligned or loose belt accelerates wear on the belt, deck, and rollers simultaneously.
What You Need Before Adjusting a Treadmill Belt
Before making any adjustments, gather the following:
- Your treadmill’s owner’s manual (critical—adjustment bolt locations and specifications vary by model)
- A hex wrench (Allen key) in the correct size for your machine, typically 5mm or 6mm
- A clean cloth
- A flat work surface or floor space around the rear of the treadmill
Safety first: Unplug the treadmill from the wall before touching any components near the rear roller or belt edge. Do not rely on the power switch alone. Confirm the machine is completely de-energized before you begin.
How Do You Adjust the Belt on a Treadmill? (Step-by-Step)
The following process covers treadmill belt tightening and basic tension correction. Always consult your owner’s manual before beginning—different manufacturers use different bolt configurations, and some models require lubrication before or after adjustment.
Step 1: Unplug the treadmill.
Pull the power cord from the wall outlet. This is non-negotiable before accessing any moving components.
Step 2: Locate the rear roller adjustment bolts.
On most treadmills, these are hex bolts located on either side of the rear end cap—the plastic cover at the back of the machine. Some models have them accessible through slots in the end cap; others require removing the cap entirely. Check your manual.
Step 3: Check the current belt tension.
Lift the edge of the belt from the center of the deck. A properly tensioned belt should lift approximately two to three inches. If it lifts more than that, or if you can feel it slipping under your hand, it needs tightening. If you can barely lift it at all, it may already be over-tightened.
Step 4: Make small, equal adjustments.
Turn both the left and right adjustment bolts clockwise by the same amount—no more than a quarter turn at a time. Equal turns on both sides maintain alignment while increasing tension. Do not turn one side more than the other unless you are specifically correcting a drift issue (see the next section).
Step 5: Test and repeat.
Plug the treadmill back in, run it at a slow speed (around 3 mph), and observe the belt. Step on it briefly to check for slipping. If the belt still slips, unplug the machine again and repeat the process in quarter-turn increments until the problem resolves.
Step 6: Confirm proper tension.
Once the belt no longer slips under normal walking or running weight, recheck the lift test. Two to three inches of lift at the center edge is the general target, though your manual may specify a different range. Do not over-tighten—a belt that is too tight creates friction drag, increases motor load, and accelerates bearing wear.
How to Center a Treadmill Belt
When the treadmill belt moves to one side during operation, the tension is uneven across the rear roller. Correcting this requires asymmetric bolt adjustments, which is where most DIY attempts go wrong.
The rule is straightforward: tighten the bolt on the side the belt is drifting toward.
If the belt drifts to the right, turn the right bolt clockwise by a quarter turn only. Plug in the machine, run it at a slow speed, and observe. If the belt is still drifting right, unplug and make another quarter-turn adjustment. If it has shifted too far left, turn the left bolt a quarter turn clockwise to compensate.
Treadmill belt alignment responds slowly and somewhat unpredictably. Do not make more than one adjustment before testing. Resist the urge to make larger turns to speed up the process—a half-turn overcorrection can create a new drift problem in the opposite direction and put you further from a solution than when you started.
If the belt continues to drift after several rounds of careful adjustment, or if it returns to drifting within a few sessions of use, the underlying cause may be a worn roller, a bent axle, or a frame-level issue. At that point, the problem warrants a professional evaluation.
How Tight Should a Treadmill Belt Be?
Correct treadmill belt tension sits between two failure modes. Too loose, and the belt slips under load, straining the motor and creating an unsafe running surface. Too tight, and friction drag increases heat, wears the belt faster, and puts excessive stress on the bearings and motor.
The general benchmark—two to three inches of lift at the center edge—gives you a functional starting point. But that specification can vary. Heavier users or higher-speed applications may require slightly more tension. Commercial-grade treadmills often have tighter specifications than residential models.
Consult your owner’s manual for the manufacturer’s recommended tension range. If that documentation is no longer available, a qualified fitness equipment technician can measure and set tension to the correct specification for your model.
Common Mistakes When Adjusting a Treadmill Belt
Even experienced DIYers make these errors. Knowing them in advance reduces the risk of creating a worse problem than the one you started with.
- Making large bolt turns. Quarter turns, maximum. More than that and you lose control of the outcome.
- Adjusting without unplugging. Always disconnect power before accessing the rear roller area.
- Ignoring the owner’s manual. Adjustment procedures genuinely vary by model. Applying a generic process to a machine with a non-standard configuration can cause damage.
- Skipping lubrication. Many treadmill manufacturers recommend lubricating the deck before or after belt adjustment. Running a dry belt accelerates wear regardless of tension.
- Over-tightening to fix slipping. A belt that slips even when properly tensioned may have a worn deck or insufficient lubrication. Adding more tension treats the symptom without addressing the cause.
When Should You Call a Professional?
DIY belt adjustment is appropriate for routine tension and minor alignment corrections. It is not always the right tool for every problem.
Consider contacting a qualified technician if:
- The belt continues slipping after correct tensioning
- The belt repeatedly drifts despite multiple centering attempts
- You notice unusual noises from the roller or motor during operation
- The belt shows visible cracking, fraying, or uneven wear across its width
- The machine has not been serviced in more than a year and is used regularly
For customers in the northeast, professional treadmill repair in NJ and fitness equipment repair in NJ is available through certified technicians who can assess belt condition, roller alignment, motor load, and deck wear in a single visit. A thorough treadmill repair service evaluation often identifies compounding issues—worn deck, low lubrication, bearing wear—that DIY adjustment cannot address.
Preventive service also helps. Scheduling preventive maintenance for your treadmill once or twice a year extends belt life, protects the motor, and keeps the machine running within specification. The cost of a service visit is typically far less than a belt and deck replacement that preventive care could have avoided.
If you are managing multiple machines or a commercial facility in New Jersey, a fitness equipment repair and maintenance plan can reduce downtime and extend equipment lifespan across your entire floor.
The Bottom Line: Small Adjustments, Done Carefully
Treadmill belt adjustment is a skill that rewards patience. The mechanics are not complicated—you are moving a belt along a roller by changing the tension on one or both sides. The discipline is in making small moves, testing thoroughly, and recognizing when the problem requires more than a hex wrench.
Done correctly, regular belt adjustment keeps your treadmill running smoothly, extends the life of the belt and deck, and protects the motor from unnecessary strain. Done incorrectly, it creates new alignment problems or masks underlying mechanical issues that will eventually require more extensive repair.
If you’re not confident in what you’re seeing, or if the adjustment isn’t holding, consult a professional. For readers in New Jersey, our[treadmill repair and fitness equipment service team is available to assess and correct belt issues on most residential and commercial models. You can also explore fitness equipment parts replacement options if the belt or deck has reached the end of its service life.
Frequently Asked Questions
How do you adjust the belt on a treadmill?
Unplug the treadmill, locate the hex bolts at the rear roller on each side of the machine, and turn them clockwise in quarter-turn increments to increase tension. Test after each adjustment by running the machine at low speed. Consult your owner’s manual for model-specific instructions before beginning.
How do I know if my treadmill belt is too loose?
A belt that lifts more than two to three inches from the center edge of the deck is likely too loose. You may also notice it slipping or hesitating under your weight during a workout, particularly at higher speeds or on inclines.
Why does my treadmill belt keep moving to one side?
Belt drift usually means the tension is uneven across the rear roller. Tighten the adjustment bolt on the side the belt is drifting toward, one quarter turn at a time, and test after each adjustment. Persistent drift may indicate a worn roller, bent axle, or frame misalignment that requires professional evaluation.
How do I tighten a slipping treadmill belt?
Unplug the machine, then turn both rear roller adjustment bolts clockwise by equal amounts—no more than a quarter turn at a time. Plug in, test at slow speed, and repeat until slipping stops. If the belt still slips after proper tensioning, the deck may be worn or the belt may need lubrication or replacement.
Can tightening a treadmill belt too much damage it?
Yes. An over-tightened belt creates excessive friction drag, increases motor load, and accelerates wear on the belt, bearings, and motor. The belt should lift approximately two to three inches from the center edge when properly tensioned. Always verify against your owner’s manual specifications.
How often should a treadmill belt be adjusted?
For a home treadmill used several times per week, checking belt tension every three to six months is a reasonable baseline. Commercial machines under daily use may need more frequent inspection. If you notice slipping or drifting at any point, check tension immediately rather than waiting for a scheduled interval.
Can I adjust a treadmill belt myself?
Most basic tension and alignment corrections can be performed at home with a hex wrench and your owner’s manual. However, if the belt continues to slip or drift after careful adjustments, or if you observe mechanical wear or unusual noise, professional service is the safer option.
When should I call a professional instead of adjusting the belt myself?
Contact a technician if the belt keeps slipping despite correct tensioning, if alignment drift keeps returning after centering, if the machine makes unusual sounds during operation, or if the belt shows visible damage. In New Jersey, certified fitness equipment repair technicians can assess the full mechanical condition of the machine and correct issues that go beyond surface adjustment.